Apacheをインストールしてユーザディレクトリで動かす
CentOS7上でApacheをインストールしてUserディレクトリ以下、すなわちホームディレクトリ/public_html以下でアクセスできるところまで設定してみる。VPSとしてはAmazon LightSailを利用する。
httpdパッケージをyumでインストール
$ sudo yum install -y httpd
にてapacheをインストール。httpdがパッケージ名である。
rootユーザになりapacheのconfigファイルを設定
ユーザディレクトリの設定ファイルへのPathは/etc/httpd/conf.d/userdir.confである。これをエディタで編集してやる。
$ sudo su -
# cd /etc/httpd/conf.d/
# vi userdir.conf
Configファイルの中身に入りUserDir disabledをコメントアウトし、逆にUserDir public_htmlのコメントアウトを外す
<IfModule mod_userdir.c>
    #
    # UserDir is disabled by default since it can confirm the presence
    # of a username on the system (depending on home directory
    # permissions).
    #
    # UserDir disabled

    #
    # To enable requests to /~user/ to serve the user's public_html
    # directory, remove the "UserDir disabled" line above, and uncomment
    # the following line instead:
    #
    UserDir public_html
</IfModule>
Apacheを起動させてみる
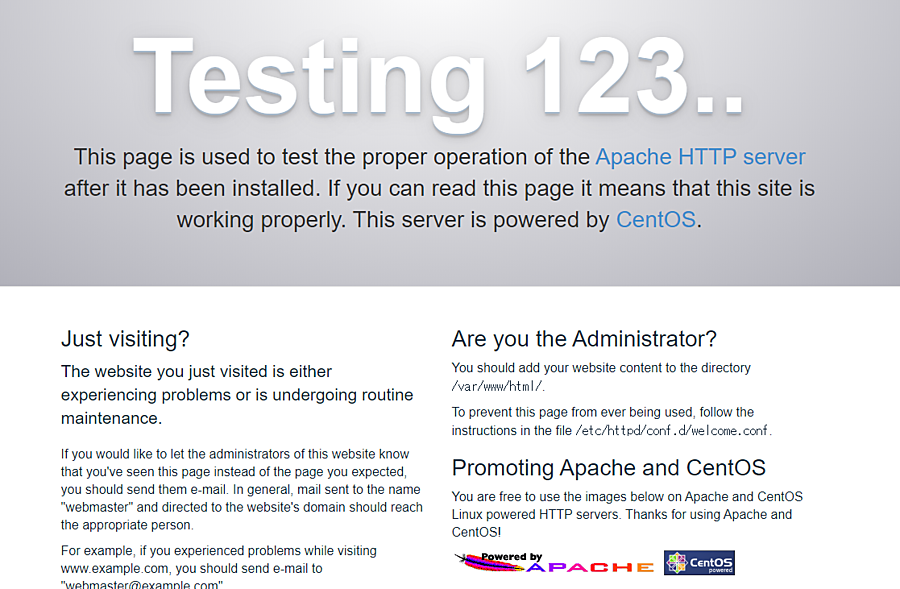
まずはapacheを起動させてみて、IPアドレスを直接打ち込みWebサーバが立ち上がっていることを確認する。
# systemctl start httpd
以下のようなページが表示されれば成功である。

ただ、まだこの状態でユーザディレクトリにアクセスするとForbiddenが返る。

起動時に自動でApacheが立ち上がるように設定しておく
systemctlのenable/disableを利用することで、OS起動時(再起動時)に自動的サービスを立ち上げることができる。
$ sudo systemctl enable httpd
確認してみる。
$ sudo systemctl is-enabled httpd
enabled
ちなみに元に戻したい時はsystemctl disable httpdで可能である。
Apacheに対する実行権限を付与
これはApacheがユーザディレクトリにアクセスしたところ、権限が無くて表示できなかったことを意味する。そこでユーザディレクトリに対する実行権限を与える。public_html以下に関しては読み取り許可も与える。
$ chmod 711 /home/yamanaka
$ chmod 755 /home/yamanaka/public_html
755とするとディレクトリにあるファイルを一覧で表示することができるが、セキュリティ上の理由などで表示したくない場合は755ではなく、711を設定しておけばよい。
SELinuxを無効化する
これでも403になっている場合にはSELinuxが有効になっている可能性がある。多くのVPSサービスでデフォルトで有効化はされていないが、AWS lightsailでは有効になっていたため手軽に扱うために無効化する。
$ getenforce
Enforcing
となっていたら有効になっている。
$ sudo vi /etc/selinux/config
で開きSELINUXの設定を書き換える。
# This file controls the state of SELinux on the system.
# SELINUX= can take one of these three values:
#     enforcing - SELinux security policy is enforced.
#     permissive - SELinux prints warnings instead of enforcing.
#     disabled - No SELinux policy is loaded.
- SELINUX=enforcing
+ SELINUX=disabled
設定ができたら再起動を行う。rebootで再起動できれば良いが、AWSの場合できなかったため、コンソール上から再起動を行う。
$ getenforce
Disabled
と表示されれば無効化完了である。
firewallのポート開放を行う
403エラーにもならずページが開けない場合はポートが開いていない可能性がある。80番ポート(http)と443番ポート(https)は空けておこう。
# firewall-cmd --add-service=http --permanent
# firewall-cmd --add-service=https --permanent
# firewall-cmd --list-all
public (active)
  target: default
  icmp-block-inversion: no
  interfaces: eth0
  sources:
  services: dhcpv6-client http https ssh
  ports: 3000/tcp
  protocols:
  masquerade: no
  forward-ports:
  source-ports:
  icmp-blocks:
  rich rules:
permanentと付けて置けば再起動後も設定した状態になる。これで設定終わり。


